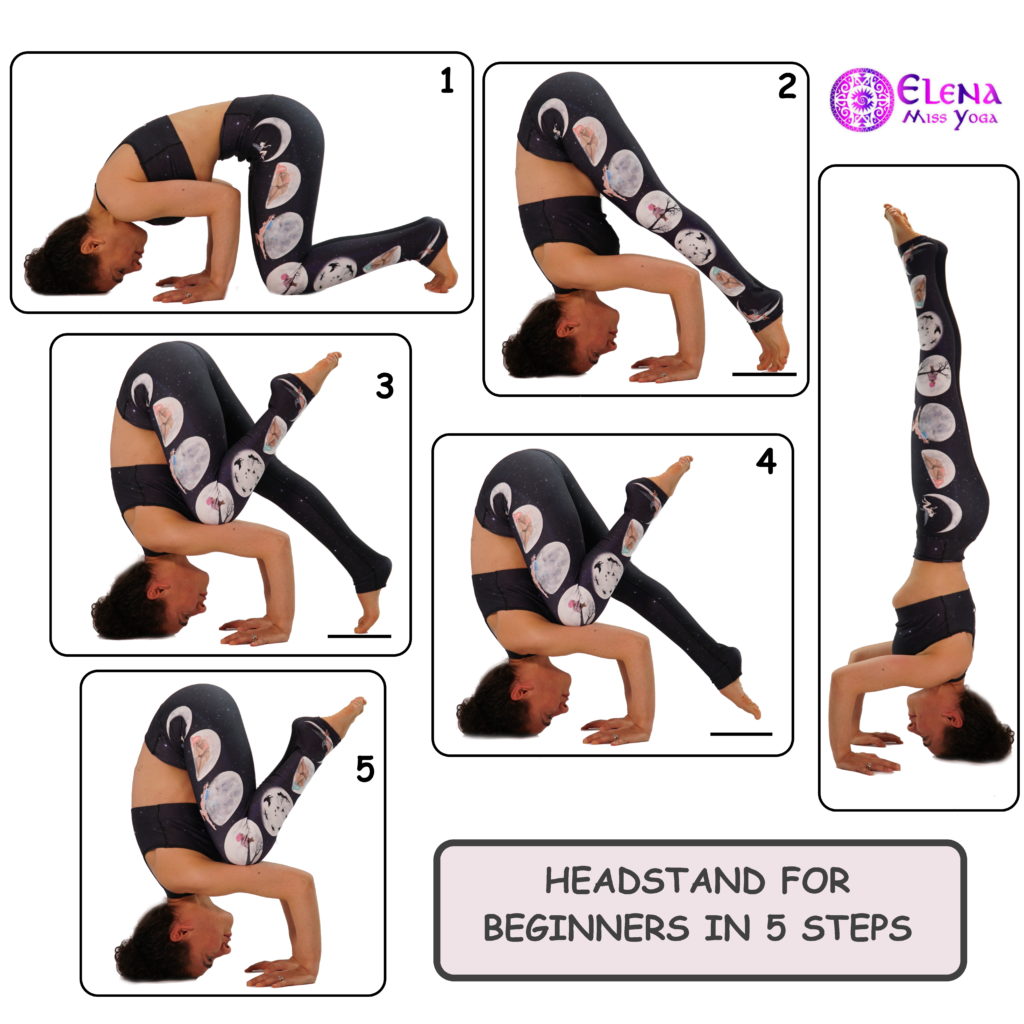
Inversions so loved and yet so frustrating at the time.
Strong inversions require daily practice and lots of patience.
You can’t think to be able to nail headstand on your first day.
Personally, it took me months to find the balance.
Your neck safety is essential in headstands, be mindful and don’t push too much too soon.
Preferably stay away from the wall. To be honest, I use the wall only for alignments and strengthening. If you start practising with the wall behind you, you will develop a wrong sense of safety that will disappear the first time you try headstand in the middle of the room. Then, you will ha to start from scratch all over again.
My suggestion is baby steps.
Start from Step 1 and till you feel comfortable don’t proceed to step 2 and so on. This tutorial is meant to be a guide to use over months of headstand practice.
Step 1
Place the crown of the head on the floor
Engage the core
You might feel dizzy at first, but with time it gets better
Step 2
Lift the butt from the core and walk on tippy toes toward the arms
This step is key, you will feel for the first time the pressure on your neck and the kind of hamstring flexibility needed to headstand.
Wait in step 2 till you feel lightness on your neck and shoulders
Step 3
Now you can try to put more weight on our neck
Shift the body weight forward, and bring a knee to same side armpit
The other foot is on the floor
Step 4
If you feel comfortable and strong in step 3 try to lift slightly the foot on the floor
YOU DID IT YOU ARE ON HEADSTAND
Step 5
Take the other knee into the armpit and voila you are and Headstand
For now, there is no need to take the legs up
Wait till next episode
